
In terms of editing podcast we can highlight three definitions: Stitching, Mixing and Mastering. Stitching means adding, removing or re-ordering the episode content. We aim to cut and condense to have planned duration of our podcast. Mixing is about manipulating different layers to create expected effect. We work on reduce background noise. Mastering is to optimize our podcast.
I can see I can choose different software to edit my podcast. Here we have the most popular

Very important is how we will design our podcast. We should remember about creating memorable intro and outro, use music and sound effects in transition between scenes. Also the dialogue must be more dominant than the music. Also we should use copyright free music. In my podcast I will be using Pixabay music. There I can find many sounds that will suits perfect to my podcast.
As today we had an introduction I decided to use Adobe Audition to edit my podcast. Audition is a professional tool which allows editing, mixing and mastering recordings.
First I open the program and I set up New Multi-track session, I add session name, I choose Folder location, I choose the template for Podcast and then click OK.


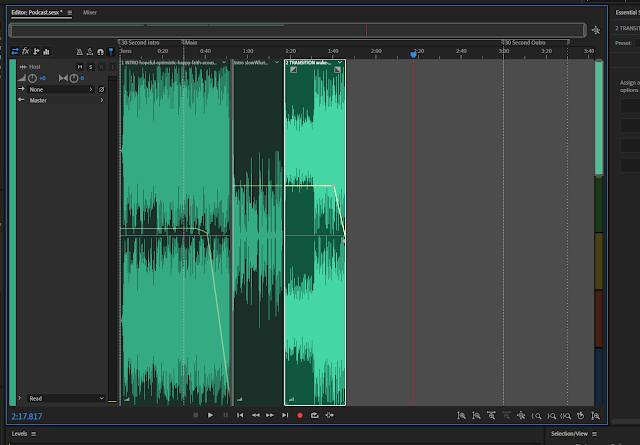
Now I can add them to the Editor in the middle of the screen just by dragging files and start editing

Now I can play my recording and decide about its duration, then I can increase or decrease the volume by dragging yellow line switch up and down

Here you can hear original version: Intro


And here you can hear improved version: Improved intro
Then I add next part which is my voice with introduction, I work witch cutting tool to adjust both recordings together and do the same with the next part working further with lowering volume
Now is to add first question and then answer from my guest and repeat step by step the process:

Here is the instruction how I switch between my Multitrack Session and single file:


After I finished editing my podcast I export the file to the desktop as a .wav file.

In the further Podcast Final Outcome post I will add the draft of my podcast and add my evaluation and reflection.
Sources:
https://www.thepodcasthost.com/editing-production/adobe-audition-review/
https://www.youtube.com/watch?v=Xv_cslQeIDE
How to Remove Background Noise in Adobe Audition

No comments:
Post a Comment